Showing posts with label flower. Show all posts

Saturday, October 9, 2010

How To Make A Hibiscus

I have been working on a custom order this week making some hibiscus pendants in several different colors. I made my first hibiscus as a special request for a customer because it was one of her favorite flowers. It has never been one of my favorite ones to make. But! as I was working on them this week I came up with a different way to put them together than what I was doing and now I am enjoying making them. :) Yay! So, I just thought I would share my newly found process on how to make a polymer clay Hibiscus Pendant.

As with every pendant/focal I make, I begin with scrap clay. I have decided that this pendant will take the amount of clay of one 40mm circle and one 30mm circle of clay rolled on #1 of my Atlas Pasta Machine.


Smoosh the two circles together and roll into a smooth ball.


I take my petal cane and cut off several slices then run them through
my pasta machine on #5 or so.


Then use the flattened slices to cover the ball.


Roll it smooth.


Flatten the ball into about a 1/4" thick disk.


Using a rounded end of a tool or pen? make a crater in the center.
Insert bails. (I use the plastic from a bacon package to build my flowers on)


Cut five petals from your cane. (about 2-3mm thick)


Flatten out a bit with your finger tips then lay the petal in your hand.


I use a moistened nightlight bulb to rub across the petal to flatten it a bit more and
smooth it out.


Make waves or scallops around the edge of each petal by pinching and twisting a bit.


Over lap the side edges of the petals lightly pressing to get them to stick together.


When you get to the last petal, tuck it under the edge of the first petal to
complete the circle.


Center your circle of petals on top of your base making sure you have them
arranged in the way you want them.

Using the end of a tool or pen push the center of your petals down into the
crater you made in the base.
Gently press your petals down onto the base.
Make a pistil and put the end in the hole you made in the center arranging it the way you want.


Finished Hibiscus Pendant ready to be cured.

I hope you enjoyed this little tutorial. The techniques I used to make the petal cane may be found in many places online. Here is a great link: Donna Kato Petal Cane

blessings, ZudaGay

Saturday, January 17, 2009

Springy Creating


After this last below zero cold snap I have heard people wishing for spring. I don't think wishing will get it here any faster, but we can always look at springy things and dream a little. I have been playing with some springy colors in the last couple of weeks. So here are a few soft pastels just for the Spring of it.
A Funny Springy Sugar Bug Bead

Pink, Yellow and Aqua

Blessings, ZudaGay

Sunday, October 26, 2008

Purple and Green - One of my Favorite Combos!

I have no idea how many times I've used purple and green together. I think the only combo I like better is something with red and black or gray. I played on Saturday afternoon. YAY! Time for playing has been very hard to come by in the last couple of weeks for some reason. And I don't have much to show for my busy-ness. Ah well...such is life at times. Anyway...the free time to play is that much more precious. I made several pieces that could be used together. I think I will list the leaves and the tiny flowers together and the bigger ones separate. Maybe they will spark someone's creativity.
A Purple and Green Grouping

Center Hole Bead

Four Leaves and Two Center Hole Flower Beads

Center Hole Bead

Flower Focal - hole drilled horizontally near the top

Pendant

Blessings, ZudaGay

Monday, October 13, 2008

Poinsettia Mode

OK, I have no idea what day I'm on. I've lost some here and there and keeping track of time and days is just totally beyond me! So, I'm dropping off the day count and I will just post about what I've been doing. There, I feel much better...a load has been lifted! hehehe....

I have been making poinsettias. These are the ones I have baked so far. I have some other colors I want to play with. There is a purple one that I saw that is just gorgeous...and I love those speckled wine colored ones. But for now these are a few of the ones I made....humm...I think it was Saturday.

Traditional Red and Green

Silver Tipped Pink with Aqua Leaves

Midnight Blue and Chartreuse

Pink and Green
Chartreuse
I'm sure there will be at least one more Poinsettia post. I have to get them out of my system, then off to something else.

blessings, ZudaGay

Friday, October 10, 2008

Day 4 is a Day of Red

My favorite color is red. It started when I was a child, in fact I don't remember a time when I didn't love red. Red was my Daddy's absolute favorite color- which might have had something to do with it being mine. When I was a little girl my Daddy was my favorite person in the world. I thought I would just make red flowers and see how many different ones I could come up with in a half an hour...actually it was getting closer to an hour when I stopped. Here is my Red Flower Show:

It is time for making Poinsettias.


A very cool button from Pearl!

A Red Dahlia!

Another cool button on a little flower bead.

I love black with red!!

Blessings, ZudaGay

Wednesday, October 8, 2008

Days 4 and 5 or....Flowers of Different Colors

On day 4 I played with lumps of clay that were laying on my work table. I really do need to clean up my work area once in a while! I like to mix colors!!! Mixing colors is one of my favorite things to do. Not just clay...I like mixing paint colors, too. I mixed several lumps together and got a lovely coral color. I decided it looked pretty good with some left over Midnight Blue that was sitting there so this is the flower that came from this combo.


Next I had some of the coral left over so I lightened it with white and put it with some lavender.


For this last flower I used the left over lightened coral and added some yellow that was sitting there to get more of an orange. I put the orange with some brown and a buttery yellow that were just waiting for this opportunity and got two canes with a bit of a Mexican flare. I really like how this flower turned out!!


Just a note: I made the canes on day 4 and the flowers on day 5.

blessings, ZudaGay

Saturday, October 4, 2008

Day 2 & 3 of 30....or...Purple Petals aPlenty

I was looking through treasuries on Etsy the other day and came across one made up of purple and pale blue items. The color combo attached itself to my brain and I had to play. First of all I mixed the purple and the pale blue I wanted to use to make my canes. This is the beginning of the blend: (sorry about the picture...but I have a terrible time taking good pictures inside)

Once I got the blend completed I had a sheet of clay that went from deep purple on one side to pale blue on the other side. I cut it in two and made two separate canes....one with purple on the outside and the other with pale blue on the outside. You can see the different petal canes in this grouping of flowers.

I also used some scraps to make a Dahlia that is suppose to be graduated from lighter on the outside to dark in the center...but I need some work to get the look I want.


I made up a rose and three buds for this pendant.

And lastly....this adorable pod. I guess it is a pod. What do you think, should I start making these?
Blessings, ZudaGay

Thursday, March 6, 2008

It's A New Thang...for me anyway

ACEOs!!! I just may become addicted to this new thing. New to me anyway. Artist Trading Cards and Artist Cards, Editions and Originals have been around for a while. I'm not too sure exactly how long, maybe around ten years or so. Although miniature artwork has probably been around about as long as there have been artists. Historically miniatures really didn't have any guidelines, they were very small works of art that the artist made either to show off their work or to enable people to carry around an image of their loved one. This new age of ATCs and ACEOs does have one guideline - for size. ACEOs must be 2.5" X 3.5" the same size as baseball cards. They may be made in any medium the artist chooses to use. In this post I am showing what I have been doing, the next one I will show you some of the ACEOs of some artists whose work I desire to add to my ACEO collection.

Secret Garden Fairy Door

Happy Tree

Just to show what happens when the oven spikes:
Burnt to a crisp Secret Garden Fairy Door

Waiting for Emily

My first one Butterfly Garden

blessings, ZudaGay

Wednesday, February 13, 2008

Knitsteel - Handforged by Kirsten Skiles

I remember, as a child, reading stories about blacksmiths making horseshoes and various tools . In my little girl mind I envisioned a person who worked with metals as a big guy who pounded steel and iron into shape. I can remember at a young age standing and watching a blacksmith working. It must have been at the county fair. This person wasn't large and he wasn't making horseshoes. He was making lovely graceful wall sconces and hooks. I love when our preconceptions are jolted into change!

I'd like to introduce you to a lovely artist whose work literally takes my breath away. I came across Kirsten's Etsy shop a couple of months after I joined Etsy. I loved her crosses which were elegant, rugged and very powerful! Her leaves so lifelike and beautiful and the tools she creates for other artist to use have these lovely simple lines that somehow call me to pick them up and do something. Kirsten lives in Wisconsin with her family. Here is an excerpt from her Etsy Bio.

"Kirsten Skiles is an Artist Blacksmith and Jeweler creating nature themed romantic home decor and jewelry.

Kirsten has taught at a number of well known craft schools, including Touchstone School of Crafts, John C. Campbell Folk School and Appalachian Center for Crafts.

She has exhibited both nationally and abroad. As a self-employed artist she works frequently on commissions for private residences through interior designers, architects, and other blacksmiths."

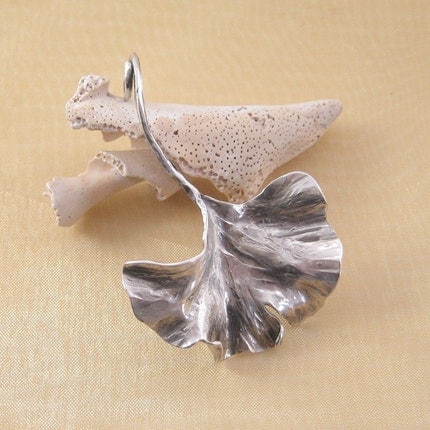
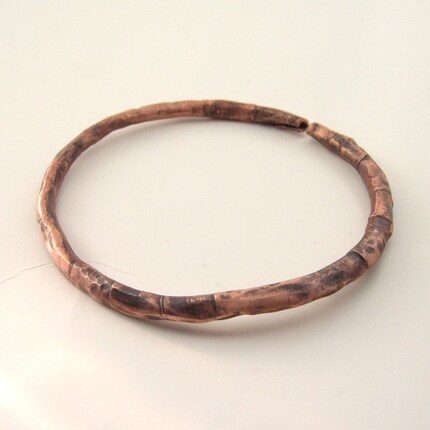
Here are some of the lovely items you will find to purchase in Kirsten's Etsy shop, Knitsteel.

This piece is my favorite in Kirsten's shop right now!!
Hand Hammered Sterling Silver Ginkgo Leaf Pendant No. 2


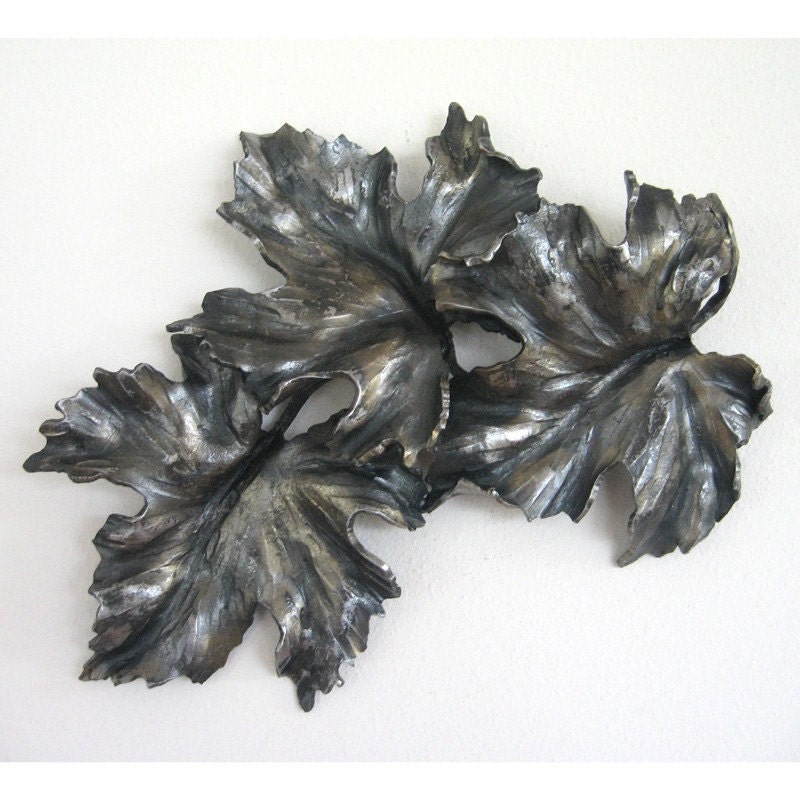
And this beautiful Grape Leaf Trio - wall art

Kirsten also does commission work. I had such a hard time choosing what two pictures of Kirsten's commission work to share! They are all so amazing!! I implore you to take some time and go look at Kirsten's Flickr site.

Copper Angelic Lectern
a commission piece for the Trinity Lutheran Church in La Crosse, WI

If you would like to know more about Kirsten Skiles and her work please visit her blog Hand Forged by Kirsten Skiles. To see more of Kirsten's work visit her Flickr site. And to buy Kirsten's lovely work you may browse in her Etsy shop, Knitsteel.

Blessings, ZudaGay

LinkWithin

Blog Widget by LinkWithin